SARC Events


SARC Events


FoxHunt
Video
SARC Courses
Course Information
Field Day
Video

2018-08-15

My Screwdriver Antenna Experiences


Even On A Compact SUV


Some of you may be familiar with the Hi-Q line of mobile HF antennas. SEPAR has several, a choice prompted by the need for a relatively compact, portable HF antenna that is quick to set-up in the field, at least until a more robust antenna can he erected. As an RV’er I decided that I needed a usable mobile HF antenna that I could erect quickly, but that would provide me with a worthwhile HF experience. There is nothing worse than spending hours at the radio and not hearing a soul on the air!

In order, my criteria were:

  • Performance 
  • Size;
  • Ease of set-up (not necessarily speed);
  • Ruggedness; and
  • Solid mount

I researched a number of mobile HF antennas including the Buddipole and Tarheel products. Not to bad-mouth these other products, but I tried both and was not satisfied that they would meet my expectations. I was impressed by the quality of construction and military spec components of the Hi-Q. Performance reports were good (provided it is properly installed) and it met my needs for ease of transport and mounting.

Hi-Q antennas are made in the workshop of Charlie Gyenes, W6HIQ, VA7HIQ in Wildomar, CA about 150 Km SE of Los Angeles. Charlie has been supplying these antennas for over 20 years and is a supplier to the US military and NASA. I visited Charlie to pick up my Hi-Q  and he is an interesting, though opinionated fellow who came to the US from Hungary via Canada during the 1956 revolution. Charlie worked for Boeing before setting out on his own.

Charlies’s workshop is modest, consisting of a medium sized building beside his home. When I visited, he had about 20 Hi-Q’s ready to go. He also showed me several military antennas—ruggedized versions of the Hi-Q, and a huge VLF antenna which was to be installed aboard a US Navy submarine. His test equipment is impressive and his greatest joy is in developing new concepts which can be incorporated into his antenna designs. I mentioned Charlie was opinionated… he pulls no punches when describing his competition and he is obviously very proud of his product. 

Before we left, Charlie’s wife, a lovely lady, insisted on preparing lunch before we headed out with the antenna. 

Some Mis-steps

Arriving at our Palm Springs RV Resort, I set up the antenna on a satellite stand, a setup we had used with SEPAR at community displays. This antenna is a typical screwdriver design, the coil being contained in a 20cm diameter plastic housing. A rotor moves up or down the inside of the coil to decrease or increase the virtual length of the antenna, thereby tuning it to the appropriate frequency. To complete that process, the user can use something as simple as a toggle switch, a turns counter, or a third party automatic antenna tuner. I had opted to purchase Charlie’s turns counter, basically a switch box with an LED numeric display that shows how many turns are in the antenna circuit. This worked but I found it less precise and it was easy to under or overshoot the target frequency with just one rotation. 

Palm Springs is in a ‘bowl’, surrounded by tall mountains, I found that the antenna performed well for strong stations within 1000 Km, but was not stellar for DX.

The ‘Right’ Set-up

This year we sold the RV but I still wanted to be able to travel with the Hi-Q to operate mobile. We stay in an RV Resort with antenna restrictions, but they do not cover antennas on vehicles. We often travel with bicycles and my wife suggested I find a way to mount it on the car’s bike carrier (see photo below). This also permitted me to easily remove either just the antenna or the rack and antenna. I added a ground strap to the frame and also added a current balun to the feedline. Additionally, I extend about 20ft of plain hookup wire directly out from the rear of the vehicle... kind of a counterpoise. With this revised setup and my Icom 7000 (100 Watts max.) I worked the CQ WW DX contest. What a difference! Granted the conditions were excellent and even the high bands were open but the results were immediate and surpassed any previous use of the Hi-Q. I worked stations throughout the US, Canada and the Caribbean. I also worked Portugal, Mexico, Japan and added two new countries, Curacao and Cape Verde—the latter my first African contact. On all bands I got an SWR less than 1.6 and as low as 1.1 on 20m.

I’ve  now purchased the automatic tuner for use with my Icom, a purchase that I hope will ease tuning and further improve my portable station. Given my recent experience, I’d recommend this set-up for anyone with strata restrictions wishing to operate HF.

More info at: http://www.hiqantennas.com/

The Hi-Q with whip is 12' high
The bicycle mount provides enough height to
work HF, even on the low bands


2018-08-12

Brett - Where to start?


Jim Smith VE7FO Also Remembers Brett

My own involvement with SARC started when I was recruited by John VE7TI, as a Field Day operator. 

There are many enjoyable ways of conducting FD which range from everyone sitting around the BBQ, telling stories and making a few contacts to the hard core contest style where everybody goes all out to WIN.

I was told that it would be a hard core, win for Canada, situation.  Being a hard core contester myself I took the bait.
Well, it turned out that the operators, while enthusiastic, didn't have the HF contest experience necessary to achieve the goal.  Nonetheless, it was obvious that the potential was there so, once FD was over, I joined the Club and made a FD training proposal to the Exec with the goal of winning for Canada, which was accepted. 

This training started in October (I think) and ran until next year's FD.  It consisted of many formal training sessions including class room style and participation in the major contests, during which the ops received coaching on the operating techniques for maximizing the number of contacts per hour.

This would be a very significant investment of time for the trainees.  Brett realized that many people might be worried about this so he started a "Get Your Feet Wet" program to provide a low commitment introduction to contesting so that they could see whether or not they liked it. 

Here's how it worked.

A potential trainee would sign up for an hour or two of operating time during a major contest.

The trainee would operate the contest while being mentored by one of the experienced members, with no requirement that he sticks to it for his entire shift. 
If, after 15 minutes or whatever, the trainee says, "This is not for me" and ends his session then it will be obvious that attending the formal training would not be a good use of his time.

Conversely, if he really enjoyed the experience then he was more disposed to make the time commitment required by the formal training.

Brett managed the whole thing.

Altogether, a stroke of genius on his part.

Some trainees enjoyed the Get Your Feet Wet program so much that they repeated it three times!

Brett was also very involved in the formal training and was a great help to me.
Did the training achieve the #1 Canada goal?  No, but we did move up to #2.  After a 2nd year of training we made it to #1.

Brett was both persuasive and persistent.  Over the course of several years on the FD Committee he kept pointing out that some QRP FD operations did VERY well using only 5 watts of power, making better scores than us with 100W.  (QRP is ham lingo for operating at 5W or less.)  The way that the FD scoring is set up, a CW contact using more than 100 watts is worth 1 point, one using 5 to 100 watts is worth 2 points and one made using less than 5W is worth a big 5 points.    Sounds like a no-brainer.  You want to maximize the points?  Go QRP.  Just one problem.  People find it hard to hear you so you get fewer contacts per hour.

Finally, the FD Committee started paying attention to his point of view and consulted propagation predictions to see what we might be able to do with just 5W.  Hoo boy!!  With some adjustment to the antenna lineup we could do very well indeed.
Did we?  We sure did.
 
Shattered the Canadian record for all categories.

Out of 2,719 FD stations in the US and Canada in 2015, some with more than 10 transmitters and most running 100W, we ranked #91 with our 3 transmitters and 5W.
Altogether a VERY significant achievement which any club would be proud of.
Wouldn't have happened without Brett.

We were very fortunate to have had Brett as a member.

Brett's gone

Damn!

~ Jim Smith VE7FO


Remembering Brett Garrett VE7GM - SK


One of the 20%

They often say that 20% of a given membership do 80% of the work... Brett was one of the 20%, no, more like 5%. An active member of both the Surrey Amateur Radio Club (SARC) and Surrey Emergency Program Amateur Radio (SEPAR), Brett freely shared his knowledge and led Surrey Amateurs to two very successful Field Days.
Brett VE7GM Silent Key
Brett first got his ham license around 1967, and enjoyed doing a little youthful operating before life got in the way.  

In 2012, John Brodie shared a memory of an early encounter with Brett:
"I was licensed in 1960 when I was in 10th grade at Prince of Wales High School.  After graduating in 1962 I put ham radio aside as I began my Engineering education.  My ham radio gear in those days consisted of mostly post WW2 vintage odds and ends of the “low budget” variety, scrounged, donated by ham friends or purchased with paper route earnings.  
Before retirement, my father worked at C Gardner Johnson, ships agents in Vancouver for the Swedish Johnson Line and Japanese Mitsui OSK.  One of his colleagues was a man which we children only knew as “Mr. Garrett”.   Since I knew that there would be no ham radio in my life for a few years, I disposed of all my gear.  The receiver, a military version RCA ACR-3 behemoth weighing about 100 lb, went to an aspiring ham in the neighbourhood named Bill Coltart who, through research on the RAC registry, I find is VE7BMM.  The remainder went to my father’s colleague, “Mr. Garrett” whose son, I was told, was interested in ham radio. 

At the time I never met the son, and wondered if he had gone on to get licensed and involved in the hobby.  Now I know.  He is our Brett Garrett VE7GM, a relatively new member of SARC and now a Director, who, like me, came back to the hobby after several decades away and was featured in last month’s “RadioActive”.  Garrett is an enthusiastic participant in club activities, including the CW subgroup of the “Operator Skills Training” and contesting program started last Fall. The photo shows Brett returning the “junk”, including a Harvey Wells TBS-50 transmitter to its former owner."

Brett first became intrigued with ham radio as a sixth grader.  His interest in electronics began when his father bought him a radio kit.   A school administrator discovered his intense interest in electronics, and suggested to his mother that perhaps he should consider getting a ham license.  Brett soon began attending ham classes run by the Vancouver Club in a member's basement, and succeeded in getting his license.  

'Back in the day' when VE7GM got licensed, Morse code was a requirement for a Basic license, and operators had to show proficiency at 10 w.p.m.   After assembling some equipment, Brett began operating HF on 80 and 40 meters using code.

Move forward several decades and Brett refreshed his Basic with Honours, Morse and Advanced qualifications. SARC was pleased to have this long-time ham join the club after he became active again. He went on to become a Director, Vice-President in fact, and also became active in SEPAR. It was Brett's interest on the emergency communications side of Amateur Radio that sparked his renewed interest in the hobby.  Having taken early retirement from his career as a Power Systems engineer for BC Hydro, Brett became more concerned with community level emergency preparedness after the Japanese quake and tsunami.  He ran into then SEPAR Coordinator Kelvin Hall VA7KPH at a local swap meet, and decided to get back into the hobby, and get involved. 

Brett trains SARC Members Nell and Ralph for contesting
For the 2012 BC QSO Party, he operated from his home station, which he'd just gotten operational the day before.  While not much of a 'rag chewer', Brett found the contest environment to be an enjoyable and satisfying operating environment.
Brett looked forward to refreshing his CW skills, advancing from his 15 to his target of a solid 30 w.p.m.  Towards that end, Brett became actively involved in the SARC Contesting/Operating Skills training program led by Fred Orsetti VE7IO and Jim Smith VE7FO. That program, with Brett's capable help, brought forth many of the skilled contesters we now have at SARC. Describing the experience as 'just terrific', Brett reported that he'd learned a great deal, while having lots of fun in the process. 

Living in the Crescent Beach area until recently, with somewhat limited antenna space, Brett operated an IC-7000 on a 20 meter dipole at about 4.5 meters high. After his mother passed a couple of years ago, Brett decided to move to some property he had on Green Lake with the intention of building his dream station. As a result we saw less of him, although he was occasionally available in town for coffee and the annual SARC Christmas Party.

Brett said more than once that he was very happy to have become active in the Surrey-White Rock Amateur Radio community, and was grateful that hams, who have so much capability and knowledge, are so generous in sharing their time and experience.  Having seasoned operators willing to sit down and really help you made all the difference.  For him, the club experience and the high caliber people who were there to help, was a recipe for enthusiasm and inspiration that pushed him to go further and try harder.  

We will miss Brett.


Brett is presented with a certificate by Jim VE7FO
for his tireless work training SARC members in contesting


2018-08-11

Chronology Of A Tower Installation - Part 3


The Communicator Revisited - October 2012

Phase 3: Its a Tower!


Part 2 of my chronology in last month’s Communicator took us to the completion of the concrete pour.  Since then I decided not to grout beneath the base plate, as grouting seemed likely to cause retention of moisture and possibly lead to corrosion; also, the leveling nuts would no longer be adjustable. 

After the concrete set for a couple of weeks, I invited the willing crew over once more to help me move the tower from its storage location onto the base and bolt it to the hinge.  This tower weighs something like 800 lb. so 3 or more persons are required to lift it.  Although I still had the old bolts from the previous owner, the threads were in poor condition therefore I elected to purchase new ¾ inch galvanized Grade 5 bolts from Princess Auto.  With the two hinge bolts in place, we installed the tower lifting device and attached its cable to the tower.  

The hand winch was able to handle the lift easily as we slowly raised the tower to a vertical position [left] and bolted the 3rd leg.  The leveling screws under the base plate were adjusted to get the tower perfectly plumb [right].  For the next week, I did not raise the tower higher, but just sat back and admired it before eventually lowering it to the ground once again.  I installed a mast and rotator – a Ham III – half way up the top-most section of tower, and connected an 8-conductor cable to both rotator and controller.  After testing to see if the mast rotated as it should (it did), I attached my 2m/440 vertical to the mast and once again raised the tower to a vertical position.


Spirit level in hand, Rob VE7CZV oversees quality control and gives ‘thumbs-up’
that the final product is secure and plumb.

Since then I have cranked up the tower sections to a height of about 35 ft. at which height it has remained for the last 2 weeks to “introduce it to the neighbours”.  So far, there has been no sign of the lynch mob!  


Three ground rods are embedded in concrete at the edges of the concrete footing.  I connected each of these to its respective leg of the tower with #4 copper wire, using two stainless steel hose clamps.  The copper wire is separated from the galvanized tower leg with a piece of 1/8” x ¾” x 3” stainless steel in order to discourage galvanic corrosion which could be expected if the two dissimilar metals were in intimate contact.  The other end of each ground wire is fastened to the copper-plated ground rod by bronze clamps.  Before assembling the clamps and conductors, I smeared the surfaces with GB Ox-Gard paste (from Home Depot) to discourage oxidation and maintain a good electrical bond.   What’s next?  I am waiting for a new 3-element beam, good for 40 m through 6 m and will attach it to the mast when it arrives in a couple of months.  Then, I look forward to snagging some good DX in the winter months with my 100 watts.

~ John VA7XB


2018-08-08

Chronology Of A Tower Installation - Part 2


A Communicator Reprise: September 2012

Phase 2 - The Foundation

Last month I described my efforts to factor in the various constraints at my QTH around location and installation of a self-supporting tower, and then to begin digging the foundation hole.  Persistent effort with the shovel and jackhammer gradually got the job done over a period of 3 weeks, with the hole ultimately reaching the design depth of 6 ½ ft deep.  

Soil from the last 2 ft had to be loosened, shoveled into buckets and lifted out by rope.   I was lucky to encounter no significant amount of water or large boulders, just stones and stiff clay, the latter of which turned mushy if allowed to get wet after loosening and before removal.  The result was a hole of desired dimensions with vertical, competent sides and no need for formwork below grade.  I actually made the hole 60 in x 63 in wide, which is larger than the 4.5 ft x 4.5 ft called for in the spec.


Next I purchased re-bar in 20 ft lengths and constructed the reinforcing cage later to be lowered into the hole.  This proved to be a challenge as rebar does not easily bend and moreover, it tends to bend where you don’t want it.  After some experimentation and initially poor results, I made a bending jig that allowed all the critical pieces to be fabricated to identical size and shape.  Bending was done with a 2 ft piece of steel pipe inserted over the rebar, held in place in a vice or in the jig.  I then assembled the various pieces of rebar into the final configuration by first driving the 8 vertical elements a short distance into the ground to temporarily hold them upright, then tie-wrapping the horizontal elements one-by-one to the vertical elements from the ground upwards.  I left off the top elements initially to limit the weight while the cage was lowered into the hole, then added them later once the cage was in place.  The contraption was rather wobbly until surrounded by concrete.


After completing the rebar cage by adding the final horizontal elements in situ, a head frame of the required size was fabricated from 2x6 and 2x10 lumber, positioned over the hole and the rebar cage and shimmed level.  Some finishing details were added to the frame to give the final product a beveled edge.  I then made up a temporary 2x4 support for the steel tower base which I had purchased from the manufacturer, US Towers.  Prior to this I had acquired three 27 inch long bolts of correct ASTM specs from a local supplier, Trydor in Surrey (half the price of ordering from US Towers).   The assembly was placed on the frame in readiness for concrete to be poured. I had also acquired three copper-plated steel ground rods which were hung from the outside edge of the frame to be embedded into the edges of the concrete.


The foundation required about 6.5 cu. yd of concrete, but ready-mix was not feasible for several reasons, so it all had to be mixed manually.  For this I had 8 cu. yd of Navvy Jack delivered along with 42 bags of cement and moved it all to the back yard in readiness for the pour.  At this point, I called for assistance as the pour had to be done all at one time, and this was more concrete than one or two persons could easily manage in a single day.  Sean VA7CHX, Anton  VE7SSD, John VE7TI and Ed (a non-ham friend) came to my rescue.
  

We set up two rented mixers next to the hole with the Navvy Jack, cement and water close by.  I also rented a concrete vibrator which was lowered into the mix periodically during the pour and used to remove entrained air and distribute the concrete around the rebar and anchor bolts.  Starting at 0730 on a warm Thursday morning, the crew continued mixing and pouring until the job was done around 1300.  The top was leveled with a screed, then left for an hour or two to partially set before finishing the surface.  The forms were removed the next day and the concrete kept moist for several days thereafter during the hot weather to improve curing. 

This tower is hinged at the base and can be raised and lowered with a special fixture and hand winch, making erection a relatively simple matter.   Shortly, I plan to temporarily connect the tower to the base, raise it to a vertical position then adjust the leveling nuts below the base to ensure the tower will be absolutely plumb.  Once I am satisfied with this, I will remove the tower and fill in the space beneath the base with thin-set mortar.  The tower will again be attached to the base and raised.  Our next installment will describe these steps.


~John Brodie VA7XB


2018-08-05

Chronology Of A Tower Installation - Part 1


The Communicator Revisited - August 2012

Phase 1 - Preparation


The original plan was to document my experience with a planned tower installation at the new QTH, starting with first encounter at Surrey Municipal Hall, continuing with preparations on the ground, then concluding with the actual tower erection. This journey started 6 months ago shortly after I had moved into my new abode, when I made inquires about the procedure for erecting a tower and beam. My application for a building permit was refused by Surrey. Because of some legal sensitivities, I am going to defer my discussion of further developments with the municipality, and simply say that the installation is now going ahead – the bureaucratic hurdles to be reported at a later date. 

Major physical problems to be resolved: 
how to actually dig the hole since a machine cannot (legally) get access to the back yard; 
where to dispose of the large volume of soil that will be removed; 
how to get ready-mix concrete from the street into the hole, once completed, or alternatively should I make up my own concrete? 

Last week I confirmed the location of the proposed tower and began digging the hole. Chief among my concerns was the need to have the tower sufficient offset from the property line so that the beam will not hang over my neighbour’s property. In addition, because my lot is heavily treed, I needed to spot it where branches will not interfere now or later. 

Soils in this area of Surrey are comprised of dense glacial till, which typically contain a random mixture of clay, sand, stones and boulders. The good news is that such soils being stiff and difficult to erode, can often be excavated without slumping or over excavation, which means vertical walls on the excavation. The bad news is that they make for difficult digging… my situation exactly. 

The US Tower design calls for an excavation 4.5 ft square, 6.5 ft deep, with a re-bar cage embedded in about 5 cu.yd of concrete. I elected to dig the hole by hand – I may come to regret this decision. 

Here is my log of progress so far:
Day 1: marked out the location of the excavation, removed the sod and 6 inches of topsoil. Continued down another 6” for an overall depth of 12 in. Not bad for the first day.
Day 2: Encountering stones embedded in clay which could only be dislodged with a steel bar or mattock. Got down another 6”.
Day 3: The stones and clay are so difficult to penetrate that only slow progress with hand tools is possible. Removed another 6” with the greatest of difficulty. I am now down to 2 ft depth. Mercy!
Day 4: Encountered a small area of soft sand, which was easily removed. The remaining 2/3 of the hole bottom is covered with a hard layer that appears to be rock! Is this a buried boulder? I exposed this layer to allow deployment of more aggressive techniques.
Day 5: Rented a jackhammer and, to my great relief, found that the feared rock is actually cemented clay containing weathered rock which can be broken loose.  After half a day with the jackhammer and shovel, the hole is now 3 ft. deep. From here on it gets difficult to pitch the soil out of the hole into a wheelbarrow with a shovel, so I may have to use a bucket, rope and pulley. 

Stay tuned for further progress.


~ John Brodie VA7XB

2018-08-02

A Primer On Grounding for Hams


A Compilation Of Information On RF and Safety Grounds

Nothing like a fierce electrical storm to get Hams talking about susceptibility to lightning strikes. Well, we experienced just such a storm in early August, which provides the perfect opportunity to review the topic.

Proper grounding of radio stations is probably one of the least understood aspects of  ham radio.  It almost has a certain aura of mystique or magic about it instead of being the pure science it should be. This is a very important aspect of any radio installation. There are two major criteria we need to consider when doing the planning for this installation. The primary reason has to be safety, both for ourselves as the operator who will be seated at the controls, but also for our equipment and possibly the structure… probably our home. The second of course has to do with the performance of our antenna system and it's ability to radiate an efficient signal. Let's treat these separately for now and they will combine into a total plan at the end.

Surge (or Safety) grounding

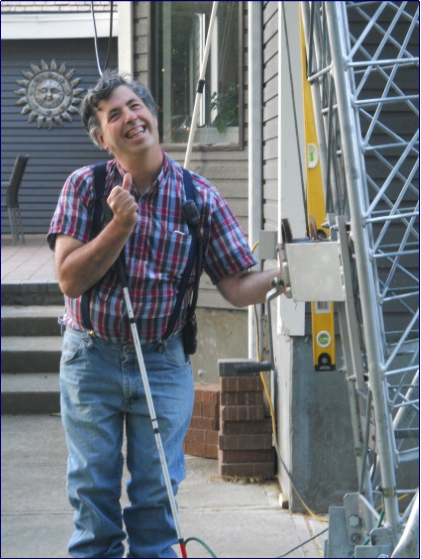
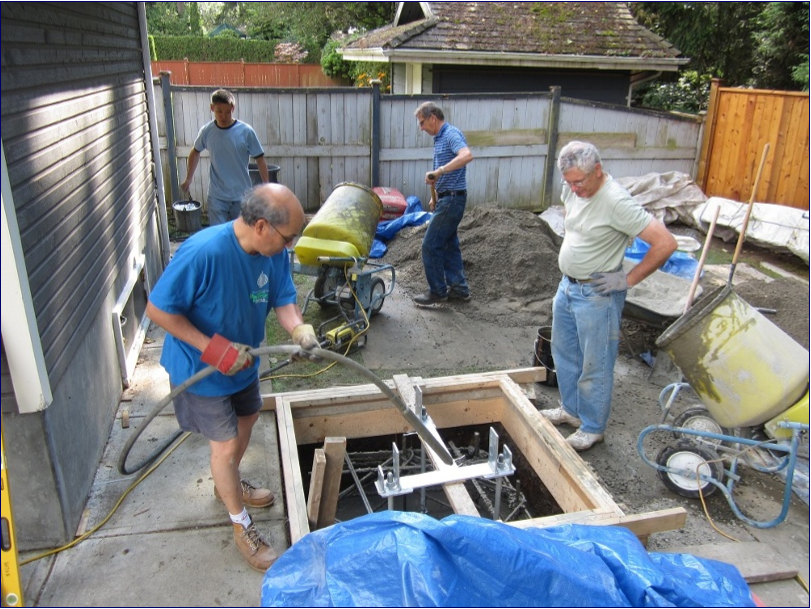
We need to protect our installation and ourselves from lightning, but… There is no protection against a direct lightning hit! It has way more power than we can shunt to ground safely or our budget can handle.  That is what insurance is for.  We CAN however make our installation an unattractive target to lightning.  We can also take care of any secondary surges and static build up that can destroy equipment and give healthy zaps enough to more than get your attention.  There is nothing more frustrating than trying to talk on a radio and you keep getting zapped on the chin while doing so!  I speak of personal experience here.  Let's let it go at that.  The Safety ground has to consist of enough ground contact surface area to safely dissipate the surges into the soil safely.  Multiple ground rods connected with solid ground wire is best.  You should have one rod where your antenna support structure is whether it be a tower or mast or roof tripod, etc.  It must have at least 4 gauge bare or insulated, NOT stranded wire.  These surges can easily be hundreds of amps.  DO NOT scrimp on the wire.  This is your life you are dealing with.  If stranded wire is used it should be no more than 8 conductors.  Heavy bolt type connectors should be used for all connections.  You should also employ a non corrosive type coating.  All of these connectors and grease are available at your good home supplies or electrical supply houses.  All grounds for the installation should be bonded together at the ground.  NEVER daisy chain grounds.  ALL connections from devices should go DIRECTLY to closest ground point.  Use eight foot copper ground rods for all.  Bond the rods with single or solid bare copper wire.  Drive a ground rod for electrical supply to house if you do not already have one.  Bond it to others with aforementioned wire.  If you have overhead service to house, run wire direct to neutral wire at feed point and use split bolt connections with grease for corrosion.  If you have underground service, ground at meter box.  If your power company objects, run it to your service panel.  You need a minimum of one eight foot ground rod for every protected structure, ie, every mast, tripod, vertical antenna, etc.  These must all be connected together AT THE GROUND.  Run bare copper between the separate ground rods to form a ground system.  The bare copper provides additional surface contact area for the ground system.  It should be underground, but does not need to be deep for any engineering reasons.  Make sure you make yourself a map of the runs for future projects to avoid hitting and digging up the system in the future.  Use heavy duty bolted connectors designed for this service.  If you have access to a ground megger or ground tester the system should be less than 15 ohms.  In sandy soil this can take several rods to achieve.  I have had to put down 3, 32 foot rods (consisting of four 8 foot rods with couplers and driven in with a power driver) in sand to get the measurement needed.  This should take care of our safety grounds.

RF Grounding

RF grounding is considerably different than surge grounding.  First thing is you are working with RF.  Since it is an AC signal it has impedance.  The length of the ground runs has much more to do with the fraction of a wavelength at the frequency involved than the DC resistance of the wire.  While the DC resistance of a ground wire may be only a fraction of an ohm, the impedance (or the AC resistance at RF frequency) can easily be hundreds or thousands of ohms on the same wire.  This can make it pretty difficult to get an effective RF ground.  Remember an RF ground wire is just a short antenna!  We want to make it as  LOUSY an antenna as possible!  We really don't need it radiating extra RF inside our shack.  It is supposed to remove this stuff not cause it.  An effective RF ground needs to be less than a quarter wave length at the highest frequency used.  As you can see there is no such thing as an effective ground for VHF or UHF.  We will concentrate our efforts to 10 meters and above.  This means our ground wire from radio to ground must be about 9 feet or less!  This is still pretty difficult.  All radios, tuners, meters, etc in radio system should be grounded in a star ground configuration.  The common point should be at the tuner if one is used, otherwise a ground bus bar can be purchased at an electrical house.  All Connections to radios should be with either insulated or bare wire with as few strands as possible.  RF likes smooth surfaces best.  DO NOT USE braid for RF connections.  This is an old wives tale!  Your ground run should go directly to the ground where you should have a ground rod for the connection point,  (which will be connected to all your other ground rods in the system as discussed above).  This run must be less than nine feet to be effective.  If you are on the second floor this will make this length impossible.  Use of a shielded ground* wire can stop radiation of the ground wire but you will still have a lousy ground.  Nothing can change this.  Ground wire tuners only turn your ground wire into a counterpoise for your antenna, meaning it WILL radiate.  This will only ensure that the low voltage point of your antenna will be at your radio.  Next we need to form our  RF counterpoise outside at our ground system.  You will next need to add some bare copper wire at the RF feedpoint where your shack ground wire connects to.  I prefer to use bare 8 gauge copper ground wire here.  It is single conductor, bare copper and easily bent and run around house.  Single strand is best but it should definitely be bare even if you have to strip insulation off wire.  Run it around the house or anywhere it will stay out of the way of lawn equipment but not buried deeper than ½ inches.  This is CRITICAL.  RF will not penetrate soil deeper than this at these frequencies.   Those bonding wires you have between ground rods and ground rods do not exist to the RF!   Burying this wire under wood chips or similar non conductive landscaping, etc is the way to go.  This counterpoise should be as long as the wire antennas you have in the air.  For most hams this will be about 130 feet.  Longer is better.  I run all the way around my house.  I have found the eight gauge will push into the spacing used between driveway and foundation when persuaded with the proper tool, (READ HAMMER).  You can connect the loop back on itself at the feed point.  This can add several S units to the receive signal and dramatically reduce noise on the signal, though nothing will help all the noise on 80 or 160 meters.   Years ago I installed a long wire antenna that was about 250 feet long and about 50 feet in the air.  This should work fantastic you say.  I had three ground rods outside window of shack with single solid copper ground wire direct to tuner. Ground wire length was only six feet.   All three rods were spaced about eight feet apart with connecting bare wire interconnecting them… in other words, a really good surge ground.  What I did not realize at that time was how lousy my RF ground was.  We could not tune the antenna on most frequencies and we kept getting zapped from the radio or microphone when we transmitted.  Also, our signal reports were lousy.  So, after consulting some experts, I added 250 feet of counterpoise around the building consisting of some bare 6 gauge copper wire I had.  The radio was on while I rolled it out and a friend was listening to the broadcast on 40 meters, (OK it was night time-best time to do antenna work right!)  Anyway he reported the broadcast was only about S 4-5 on meter.  As I rolled out the counterpoise it rose to 40 over S9 and came in much clearer.  We were able to tune everything easily now and SWR was rock stable.  When we did a signal test, the station we had talked to before accused us of running a contest amplifier.  We could not convince them it was only 100 watts, same as before and the same antenna! 

SUMMARY

Don't underestimate the importance of a good ground system.
Include it into the planning of that ultimate shack you are working on.  Don't scrimp on good copper wire and connectors.  Aluminum can be used above ground but never in ground.  Add one size to aluminum to achieve same current capability.   Ground everything to the system.  A ground run to ductwork in house can alleviate a lot of noise.  A run to water pipes should go direct to ground… NEVER to radios,  NEVER connect radios to ANYTHING inside the house for ground purposes.  Always run all grounds from everything to ground directly.  In other words, your furnace ducts will get one run, your water pipes will get one, etc.  Don't daisy chain to save wire.  If you have a chain link fence in back yard, run a bonding wire underground from ground system to it and bond well.  A solid aluminum or copper wire run along bottom of fence as a bonding device will make it a great addition to the system.  Weave it through the bottom fence fabric and bond every few feet with a split bolt connector.  The power company does this with all their fences around their power stations.  

A shielded ground can be made using RG 8 or similar coax to replace the ground wire.  Connect both inner and outer shields to the Ground rod and connect the center only to the radio.  Add a .1uf 1000 volt cap between ground and shield at this end.

Coax should be grounded at two sites, first at the antenna and then just before entering the house. Is there an advantage in grounding at more than these sites?
With grounds the most common experience is “the more the merrier”. As you add more, however, you usually reach a diminishing returns (no pun intended) situation where there is no *observable* improvement: that’s usually a good place to stop. There are also exceptional circumstances where grounding increases noise problems, but these, in my experience, are much rarer than the pundits who preach against “ground loops” seem to think.

Even a semi-quantitative theoretical treatment of grounding in oversimplified situations requires heavy math at RF. Experimentation is thus required even if one has done elaborate calculations. It’s often easier to use the theory as a guide to what to try, and then experiment.

I would also assume that the antenna is grounded when it is connected to the receiver as the outer braid of the coax is in continuity with the receiver chassis.

What’s ground? If connect the shield of my coax (which is grounded outside) to the antenna input of my R8, I hear lots of junk, indicating that there is an RF voltage difference between the coax shield and the R8 chassis. Last night this measured about S5.5, which is about -93 dBm (preamp off, 6KHz bandwidth). That’s a lot of noise: it was 18 dB above my antenna’s “noise floor”, and 26 dB above the receiver’s noise floor.
This sort of disagreement about ground potential is characteristic of electrically noisy environments. The receiver will, of course, respond to any voltage input that differs from its chassis ground. The antenna, on the other hand, is in a very different environment, and will have its own idea of what ground potential is. If you want to avoid noise pickup, you need to deliver a signal, referenced at the antenna to whatever its ground potential is, in such a way that when it arrives at the receiver, the reference potential is now the receiver’s chassis potential.

Coaxial cable represents one way to do this. Coax has two key properties:
  1. The voltage between the inner conductor and the shield depends only on the state of the electromagnetic field within the shield.
  2. The shield prevents the external electromagnetic field from influencing the internal electromagnetic field (but watch out at the ends of the cable!).


So, it’s easy, right? Run coax from the antenna to the receiver. Ground at the antenna end will be whatever the antenna thinks it is, while ground at the receiver end will be whatever the receiver thinks it is. The antenna will produce the appropriate voltage difference at the input side, and the receiver will see that voltage difference uncontaminated by external fields, according to the properties given above.
Unfortunately, it doesn’t quite work that way. It’s all true as far as it goes, but it neglects the fact that the coax can also guide noise from your house to your antenna, where it can couple back into the cable and into your receiver. To see how this works, let me first describe how this noise gets around.

The noise I’m talking about here is more properly called “broadband electromagnetic interference” (EMI). It’s made by computers, lamp dimmers, televisions, motors and other modern gadgets. I have all these things. In many cases, I can’t get them turned off, because it would provoke inter-familial rebellion. However, even when I turn them off, the noise in the house doesn’t go down very much, because my neighbors all have them too. In any case, one of the worst offenders is my computer, which is such a handy radio companion I’m not about to turn *it* off.

Some of this noise is radiated, but the more troublesome component of this is conducted noise that follows utility wires. Any sort of cable supports a “common mode” of electromagnetic energy transport in which all of the conductors in the cable are at the some potential, but that potential differs from the potential of other nearby conductors (“ground”). The noise sources of concern generate common mode waves on power, telephone, and CATV cables which then distribute these waves around your neighborhood. They also generate “differential” mode waves, but simple filters can block these so they aren’t normally a problem.

So, let’s say you have a longwire antenna attached to a coaxial cable through an MLB (Magnetic Longwire Balun). Suppose your next door neighbor turns on a dimmer switch. The resulting RF interference travels out his power lines, in through yours, through your receiver’s power cord to its chassis, and out your coaxial cable to your MLB. Now on coax, a common mode wave is associated with a current on the shield only, while the mode we want the signal to be in, the “differential” mode, has equal but opposite currents flowing on shield and inner conductor. The MLB works by coupling energy from a current flowing between the antenna wire and the coax shield into the differential mode. But wait a second: the current from the antenna flows on the coax shield just like the common mode current does. Does this mean that the antenna mode is contaminated with the noise from your neighbor’s dimmer?

The answer is a resounding (and unpleasant) yes! The way wire receiving antennas work is by first moving energy from free space into a common mode moving along the antenna wire, and then picking some of that off and coupling it into a mode on the feedline. In this case, the common mode current moving along the antenna wire flows into the common mode of the coax, and vice versa. The coax is not just feedline: it’s an intimate part of the antenna! Furthermore, as we’ve seen, it’s connected back through your electrical wiring to your neighbor’s dimmer switch. You have a circuitous but electrically direct connection to this infernal noise source. No wonder it’s such a nuisance!
The solution is to somehow isolate the antenna from the common mode currents on the feedline. One common way to do this is with a balanced “dipole” antenna. Instead of connecting the feedline to the wire at the end, connect it to the middle. Now the antenna current can flow from one side of the antenna to the other, without having to involve the coax shield. Unfortunately, removing the necessity of having the coax be part of the antenna doesn’t automatically isolate it: a coax-fed dipole is often only slightly quieter than an end-fed longwire. A “balun”, a device which blocks common mode currents from the feedline, is often employed. This can improve the situation considerably. Note that this is not the same device as the miscalled “Magnetic Longwire Balun”.

Another way is to ground the coaxial shield, “short circuiting” the common mode. Antenna currents flow into such a ground freely, in principle not interacting with noise currents. The best ground for such a purpose will be a earth ground near the antenna and far from utility lines.

Still another way is to block common mode waves by burying the cable. Soil is a very effective absorber of RF energy at close range.

Unfortunately, none of these methods is generally adequate by itself in the toughest cases. Baluns are not perfectly effective at blocking common mode currents. Even the best balun can be partially defeated if there’s any other unsymmetrical coupling between the antenna and feedline. Such coupling can occur if the feedline doesn’t come away from the antenna at a right angle. Grounds are not perfect either. Cable burial generally lets some energy leak through. A combination of methods is usually required, both encouraging the common mode currents to take harmless paths (grounding) and blocking them from the harmful paths (baluns and/or burial).

The required isolation to reach the true reception potential of the site can be large. According to the measurements I quoted above, for my site the antenna noise floor is 18 dB below the conducted noise level at 10 MHz. 18 dB of isolation would thus make the levels equal, but we want to do better than that: we want the pickup of common mode EMI to be insignificant, at least 5 dB down from the antenna’s floor. In my location the situation gets worse at higher frequencies as the natural noise level drops and therefore I become more sensitive: even 30 dB of isolation isn’t enough to completely silence the common mode noise (but 36 dB *is* enough, except at my computer’s CPU clock frequency of 25 MHz).

Getting rid of the conducted noise can make a huge difference in the number and kinds of stations you can pick up: the 18 dB difference between the conducted and natural noise levels in the case above corresponds to the power difference between a 300 kW major world broadcaster and a modest 5 kW regional station.

The method I use is to ground the cable shield at two ground stakes and bury the cable in between. The scheme of alternating blocking methods with grounds will generally be the most effective. The ground stake near the house provides a place for the common mode noise current to go, far from the antenna where it cannot couple significantly. The ground stake at the base of my inverted-L antenna provides a place for the antenna current to flow, at a true ground potential relative to the antenna potential. The buried coax between these two points blocks noise currents.

There has been some discussion of grounding problems on this and related echoes. I believe it has been mentioned that electrical codes require that all grounds be tied together with heavy gauge wire.

I’m no expert on electrical codes, and codes differ in different countries. However, I believe that any such requirement must refer only to grounds used for safety in an electric power distribution system: I do not believe this applies to RF grounds.
Remember that proper grounding practice for electrical wiring has very little to do with RF grounding. The purpose of an electrical ground is to be at a safe potential (a few volts) relative to non-electrical grounded objects like plumbing. At an operating frequency of 50/60 Hz, it needs to have a low enough impedance (a fraction of an ohm) that in case of a short circuit a fuse or breaker will blow immediately.

At RF such low impedances are essentially impossible: even a few centimeters of thick wire is likely to exhibit an inductive impedance in the ohm range at 10 MHz (depends sensitively on the locations and connections of nearby conductors). Actual ground connections to real soil may exhibit resistive impedances in the tens of ohms. Despite this, a quiet RF ground needs to be within a fraction of a microvolt of the potential of the surrounding soil. This is difficult, and that’s why a single ground is often not enough.
A little experimentation with my radio showed that the chassis was directly connected to the third (grounding) prong of the wall plug. I am concerned that by connecting my receiver to an outside ground I am creating a ground loop that involves my house wiring. Can you comment on this?

Yes, you have a “ground loop”. It’s harmless. In case of a nearby lightning strike it may actually save your receiver. My R8 isn’t grounded like that, so I had to take steps to prevent the coax ground potential from getting wildly out of kilter with the line potential and arcing through the power supply. I’m using a surge suppressor designed to protect video equipment: it has both AC outlets and feed-throughs with varistor or gas tube clamps to keep the various relative voltages in check. Of course the best lightning protection is to disconnect the receiver, but I’m a bit absent minded so I need a backup.
This may seem like a trivial point but I recently discovered that the main ground from the electrical service panel in my house was attached to a water pipe which had been painted over. I stripped the paint from the pipe and re-attached the grounding clamp and I noticed a reduction in noise from my receiver.

Not trivial. Not only did you improve reception, but your wiring is safer for having a good ground.

I suspect part of the reason I see so much noise from neighbors’ appliances on my electric lines may be that my house’s main ground wire is quite long. The electrical service comes in at the south corner of the house (which is where the breaker box is), while the water (to which the ground wire is clamped) enters at the east corner. All perfectly up to code and okay at 60 Hz, but lousy at RF: if it was shorter, presumably more of the noise current would want to go that way, and stay away from my receiver.

I am also a little confused by what constitutes an adequate ground. I have read that a conducting stake driven into the ground will divert lightning and provides for electrical safety but that RF grounding systems have to be a lot more complex with multiple radials with lengths related to the frequencies of interest. Is this true?

Depends on what you’re doing. If you’re trying to get maximum signal transfer with a short loaded (resonant) vertical antenna with a radiation resistance of, say, 10 ohms, 20 ohms of ground resistance is going to be a big deal. If you’re transmitting 50 kW, your ground resistance had better be *really* tiny or things are going to smoke, melt or arc.
On the other hand, a ground with a resistance of 20 ohms is going to be fairly effective at grounding a cable with a common mode characteristic impedance of a few hundred ohms (the characteristic impedance printed on the cable is for the differential mode; the common mode characteristic impedance depends somewhat on the distance of the cable from other conductors, but is usually in the range of hundreds of ohms). Of course, if it was lower a single ground might do the whole job (but watch out for mutual inductance coupling separate conductors as they approach your single ground).

In addition, a ground with a resistance of 20 ohms is fine for an unbalanced antenna fed with a high impedance transformer to suppress resonance. Such a non-resonant antenna isn’t particularly efficient, but high efficiency is not required for good reception at HF and below (not true for VHF and especially microwave frequencies).

Much antenna lore comes from folks with transmitters who, armed with the “reciprocity” principle, assume that reception is the same problem. The reciprocity principle says that an antenna’s transmission and reception properties are closely related: it’s good physics, but it ignores the fact that the virtues required of a transmitting and receiving antenna are somewhat different. Inefficiency in a transmitting antenna has a direct, proportional effect on the received signal to noise ratio. On the other hand, moderate inefficiency in an HF receiving antenna usually has a negligible effect on the final result. A few pico-watts of excess noise on a transmitting antenna has no effect on its function, but is a big deal if you’re receiving (of course, one might not want to have transmitter power going out via unintended paths like utility lines: this is indeed the “reciprocal” of the conducted noise problem, and has similar solutions).


CQ CQ CQ

The March - April 2024 SARC Communicator is now available

Another big issue The March - April 2024 Communicator, digital periodical of Surrey Amateur Radio Communications is now available for  viewi...

The Most Viewed...